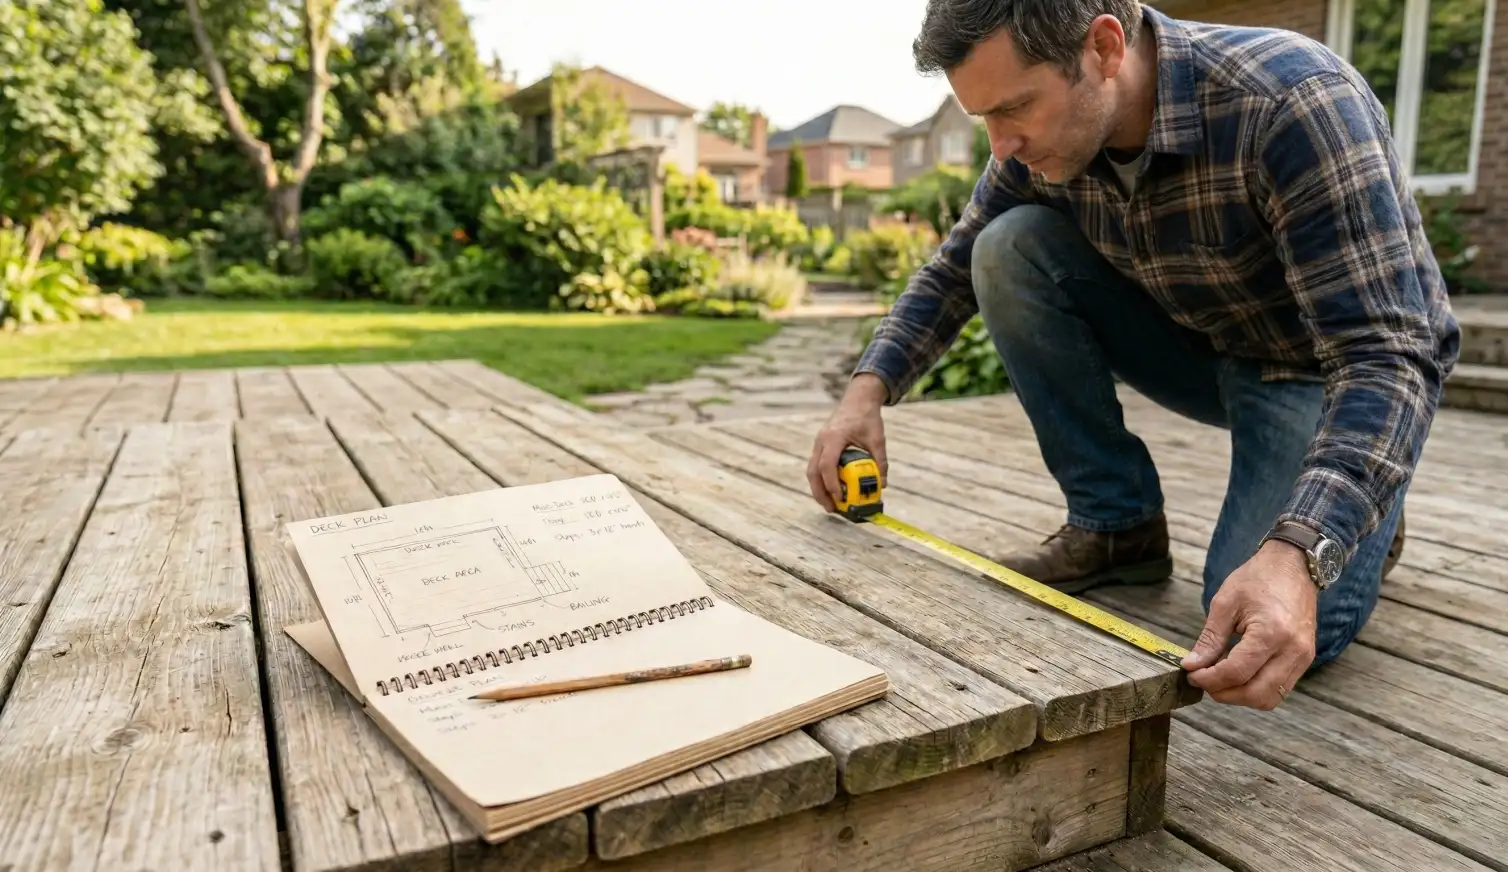
Of all the questions our team fields from DIY homeowners, measuring comes up most often — and rightly so. Getting your measurements right before you order is the single most important step in a successful installation. Order too little and your project stalls. Order the wrong lengths and you waste money. Miss a compliance requirement and you may have to start again entirely. This guide covers everything you need — from the regulatory minimums that govern what you can build, through to the calculations you need for every component on your list.
If you have not yet decided on your balustrade system — infill type, fixing method, post sizing — it is worth working through those decisions before you start measuring. The components you choose affect the measurements you take, and the measurements you take affect your component list. A full walkthrough of those early planning decisions is advised before starting.
Before You Measure — Know Your Regulations
Most people assume measuring is the first step. It is not. Before you pick up a tape measure, you need to understand the minimum requirements your balustrade must meet — because those requirements directly affect what you measure and how you order.
South African building regulations set legally enforceable minimums for balustrade height, infill spacing, and post spacing. These are not suggestions. A balustrade that fails to meet them is non-compliant regardless of how well it is built — and the consequences range from a failed inspection to an insurance claim being denied. The regulations governing balustrade installations in South Africa are worth understanding in full before your project begins. The key numbers to carry into every measurement you take are these:
- Minimum height — decks, balconies, and landings: 1,000mm above finished floor level
- Minimum height — staircases: 900mm above the pitch line, which is the imaginary line connecting the nosing of each step
- Maximum infill gap: 100mm — no opening anywhere in the system may allow a 100mm sphere to pass through
- Maximum post spacing: 1,000–1,200mm centre to centre for tube infill systems
Pool enclosures have stricter requirements. A pool balustrade must be a minimum of 1,200mm high, must include a self-closing gate, and may not incorporate any horizontal elements that could be used for climbing. These requirements apply regardless of whether the pool is accessible from the road, and they sit alongside — not instead of — the standard SANS 10400-M requirements that govern all other balustrades on the property.
| 💡 Write these numbers down before you start measuring. Every calculation you produce should be checked against them before you finalise your component list. |
Do You Need a Building Permit?
This is worth checking before your project begins rather than after. In South Africa, a building permit is required for permanent structural work — and a deck or balcony balustrade typically qualifies. The exact requirement varies by municipality, but the general rule is this: if the balustrade forms part of a new structure, if the deck it sits on is more than one metre above ground level, or if the installation involves any structural changes to the property, building plans will most likely need to be submitted and approved.
The clearest course of action is to contact your local municipality before work begins. The National Home Builders Registration Council is a useful starting point for understanding your obligations as a homeowner undertaking structural work. A balustrade must comply with SANS 10400-M regardless of whether a permit is required — compliance and permitting are separate obligations that run in parallel.
What You Will Need
- Steel tape measure — at least 5m
- Spirit level
- Digital angle finder — essential for staircase measurements
- Pencil and notepad, or your phone’s notes app
- A helper for longer runs — holding one end of the tape significantly improves accuracy
- String line — optional, but useful for checking level across longer sections
The Three Measurements Every Order Is Based On
Every balustrade component list comes down to three fundamentals. Everything else — fittings, end caps, base plates — flows from these.
- Total linear metres: the full length of balustrade required, measured along the line it will follow
- Height: from the finished floor or deck surface to the top of the handrail
- Number of posts: calculated from your run length and your chosen post spacing
Work through each of these in order, writing every number down as you go. Do not attempt to calculate your component list from memory.
How to Measure Your Run Length
Run length is the total length of balustrade required, measured along the line the balustrade will follow. Always measure in straight sections — never attempt to measure around a corner in a single sweep.
Straight Runs
Using a steel tape measure, measure from the centre of your first post position to the centre of your last post position along that run. This is your run length for that section. Write each section down separately wherever the balustrade changes direction, steps up, or terminates.
| 💡 Always add 5–10% to your total linear metres to account for cutting waste and minor on-site adjustments. It is far less costly than running short mid-installation. |
Corners and Direction Changes
When your balustrade changes direction — around a deck corner, for example — measure each straight section independently and note the angle of the corner. Most deck corners are 90°, but irregular decks may have 45° or other angles. Corner post selection depends on this angle, so accurate measurement here directly affects which components you need.
Gate Openings
If your balustrade includes a gate, measure the clear opening width — the distance between the inside face of one gate post and the inside face of the other. Note this separately from your run length. Gate posts are a different component to standard posts and need to be specified individually.
Balustrade Height Requirements
Measure your required height from the finished floor or deck surface — not the substructure beneath it — straight up to where the top of your handrail will sit. The regulatory minimums are 1,000mm for decks, balconies, and landings, and 900mm above the pitch line for staircases.
Most homeowners install to 1,000–1,050mm on flat surfaces, which gives a clean visual proportion and a comfortable safety margin above the minimum. When in doubt, install slightly taller — retrofitting a handrail that is too low is far more disruptive than cutting a post down by 20mm on the day.
One detail that catches first-timers: your post height needs to account for the fixing method. A surface-mounted post with a base plate sits above the deck surface, and the exposed post height above that base plate must still achieve your target handrail height. Factor in your base plate thickness before finalising post lengths.
How to Calculate Your Post Spacing and Quantity
Post spacing is the centre-to-centre distance between adjacent posts. The maximum permitted under SANS 10400-M for tube infill systems is 1,000–1,200mm. Closer spacing is always acceptable — wider spacing beyond 1,200mm is non-compliant and will affect the structural performance of the system.
To calculate how many posts you need for a straight run:
- Divide your run length in millimetres by your chosen post spacing
- Round up to the nearest whole number — this gives you the number of spaces between posts
- Add one — you always need a post at each end
| 💡 Example: a 6,000mm run at 1,000mm spacing gives 6 spaces. Add one end post = 7 posts total. Always round up, never down. |
Corner posts and end posts are counted separately from straight posts — they are different products and are not interchangeable. Write each type down individually so your component list reflects exactly what your layout requires.
Infill Tube Spacing and Quantity
The maximum gap between infill tubes is 100mm. This is a hard limit under SANS 10400-M — the 100mm sphere rule states that no opening in your balustrade may allow a 100mm diameter sphere to pass through. In practice, a gap of 80–100mm works well for both compliance and visual balance. A tighter gap gives a more refined appearance; a gap closer to the maximum gives a more open feel while remaining compliant.
To calculate the number of infill tubes per bay — the section between two adjacent posts — measure the internal clear distance between your posts, then divide by your chosen tube-plus-gap dimension. In practice, most installers work to a target gap and adjust slightly to divide evenly across each bay. Your total infill tube requirement is that number per bay, multiplied across all bays, multiplied by the tube length.
Infill tube calculations involve more variables than most first-timers expect. If you are unsure, submit your measurements via the DIY Estimate and our team will work through the quantities with you.
Measuring for a Staircase
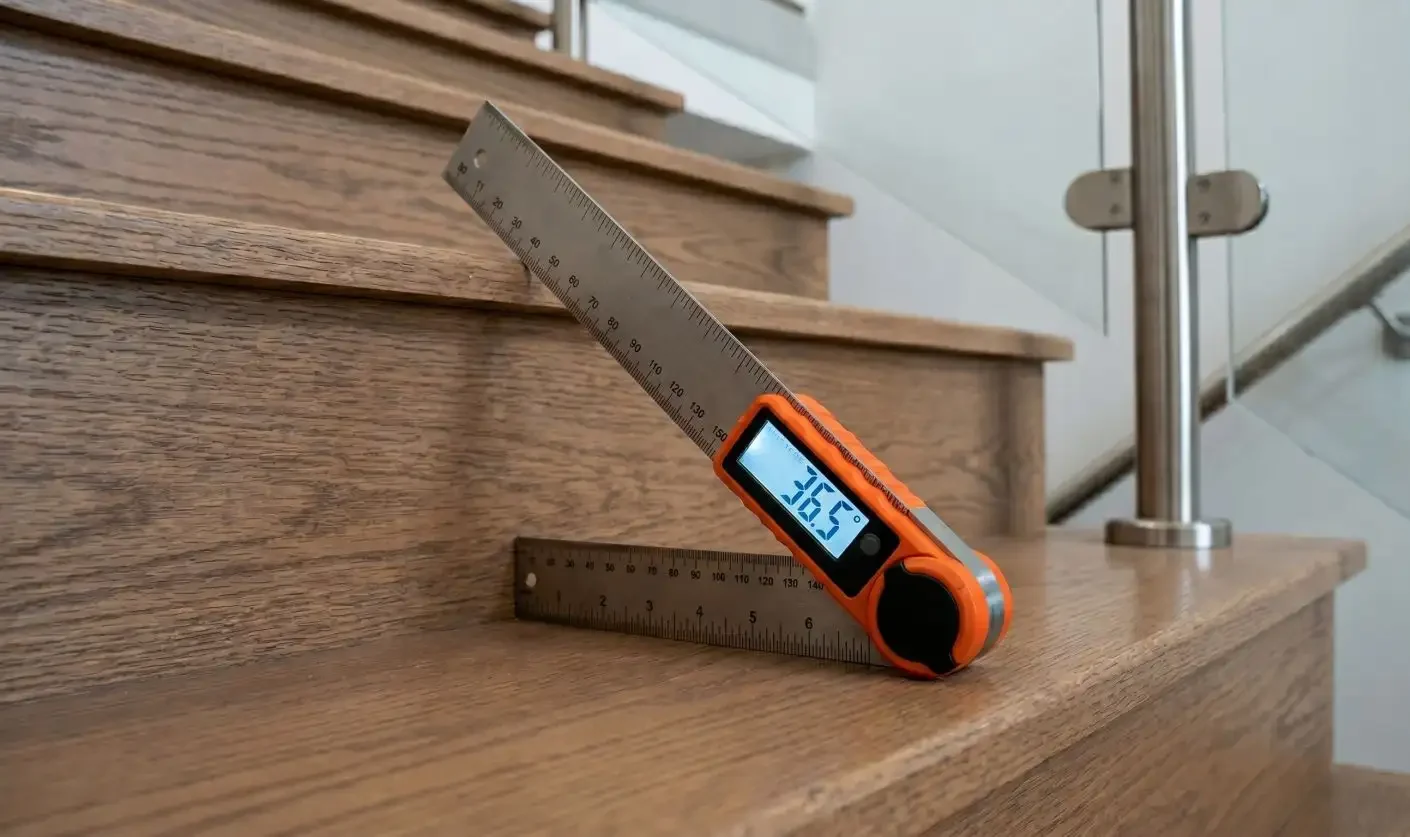
Staircase measurements are more involved than flat runs and require a few additional data points. Staircase installations require angled fittings sized to your specific rake angle — these are not interchangeable with flat fittings, and getting the angle wrong means the wrong components arrive.
Work through each of the following before compiling your list:
- Total horizontal run: measured horizontally from the face of the bottom riser to the face of the top riser
- Total vertical rise: measured vertically from the bottom finished floor level to the upper finished floor level
- Rake angle: the angle the staircase makes with the horizontal. Measure with a digital angle finder placed on the stair tread, or calculate it from your rise and run figures
- Number of treads and risers: counted individually
- Open or closed sides: note whether the staircase has a wall on one or both sides, or is open — this determines how many runs of posts and handrail you need
If your project includes a staircase, it is worth submitting your measurements to our team before placing an order. Staircase components are sized to your rake angle, and a few degrees of difference affects which products you need. The DIY Estimate service is the safest way to confirm the right specification before anything is ordered.
Measuring for Glass Infill
Glass infill follows the same principles as tube infill for run length, height, and post spacing — but glass panels are cut to size by a glazier, which means your measurements need to be accurate to the millimetre before glass is ordered.
Glass panel dimensions are determined by your post spacing and the internal height of your slotted tube frame. Once your post layout is confirmed, our team will provide the exact glass cut sizes you need to take to your glazier. Do not order glass until your post layout is fully finalised — cut glass panels cannot be returned.
Drawing a Simple Site Plan
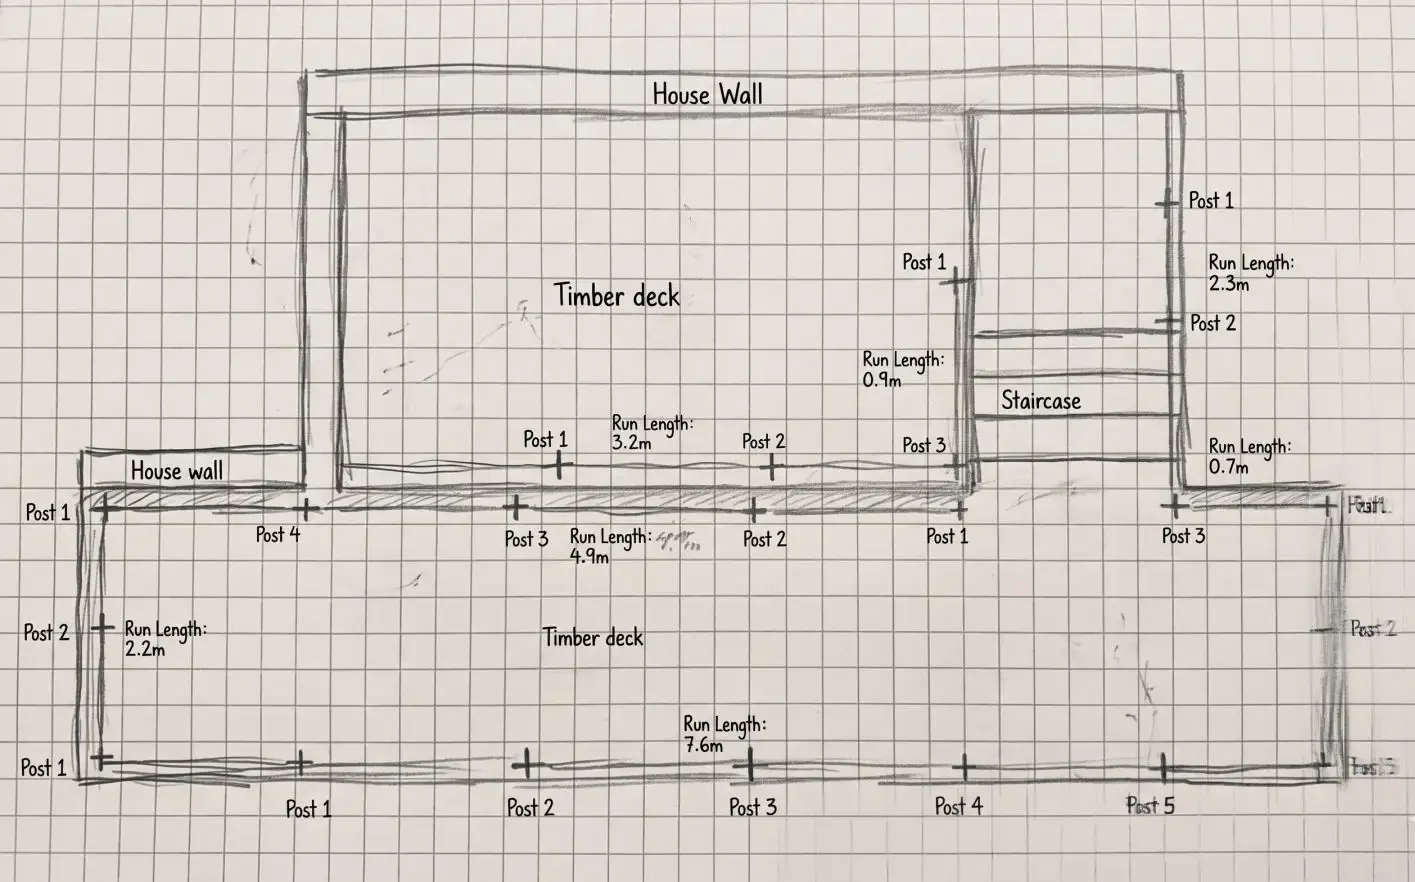
The most reliable way to avoid ordering errors is to sketch a simple top-down plan of your project before compiling your component list. It does not need to be to scale or professionally drawn — a clear sketch on plain or graph paper is all that is needed.
Your site plan should show:
- All straight runs with their measured lengths
- All corners with their angles noted
- Post positions with centre-to-centre spacing marked
- Any gate openings with their clear widths
- The surface type — timber deck, concrete balcony, steel frame
- Any special conditions — where the run meets a wall, a post, or an existing structure
Photograph the sketch and send it to our team alongside your measurements. A visual overview of the project allows us to spot complications early — a corner type that needs a different post, a bay that will not divide evenly, a gate opening that needs widening — before you have committed to any components.
Common Measuring Mistakes to Avoid
Measuring errors are the most common cause of delayed and over-budget balustrade projects — and nearly all of them follow the same patterns. Understanding where first-timers tend to go wrong is half the battle.
Forgetting the +1 Post Rule
The most frequent ordering error. If you have six spaces between posts, you need seven posts — not six. Many first-timers divide their run by their chosen spacing, arrive at a whole number, and order that quantity. They always end up one post short.
Not Counting Corner and End Posts Separately
Corner posts and end posts are different products to straight posts and are not interchangeable. Counting everything in a single number and ordering straight posts throughout means arriving at the corner with the wrong components.
Measuring to the Wall Face Instead of the Post Centre
When a run terminates against a wall, the measurement should be taken to where the centre of the end post will sit — not to the face of the wall. The post itself occupies space, and failing to account for that shifts every subsequent spacing calculation along the run.
Skipping the Waste Allowance
Infill tubes and handrail tubes are cut to length on site. Ordering exactly the linear metres your calculation produces leaves nothing for cutting errors or minor adjustments. Always add 5–10% to tube quantities.
Missing the Regulatory Minimums Before Ordering
Arriving on site with an infill gap planned at 110mm instead of 100mm, or a handrail height of 950mm on a deck, means components that cannot legally be installed as planned. Confirming your spacing and heights against SANS 10400-M before finalising any quantities avoids this entirely.
Double-Check Before You Order
Before submitting your component list or placing an order, work through the following:
- Have you measured each run at least twice?
- Have you accounted for corner posts and end posts separately from straight posts?
- Is your post spacing within the 1,000–1,200mm maximum?
- Does your handrail height meet the SANS 10400-M minimum for your application?
- Is your infill gap 100mm or less throughout?
- Have you added 5–10% to your tube quantities for waste?
- If pool fencing is involved, have you confirmed the 1,200mm minimum height and self-closing gate requirement?
- Have you checked whether a building permit is required with your local municipality?
| Not Sure What You Need? Get a Free DIY Estimate. Measuring is only half the job — turning those measurements into the right component list is where most first-timers come unstuck. Submit your measurements to our team via the DIY Estimate and we will produce a complete, itemised component list for your project. We check for common errors, confirm your post quantities, flag any compliance issues, and make sure you are ordering exactly what you need before you spend a rand. 📧 sales@balustrader.co.za 📞 +27 64 044 1440 |


