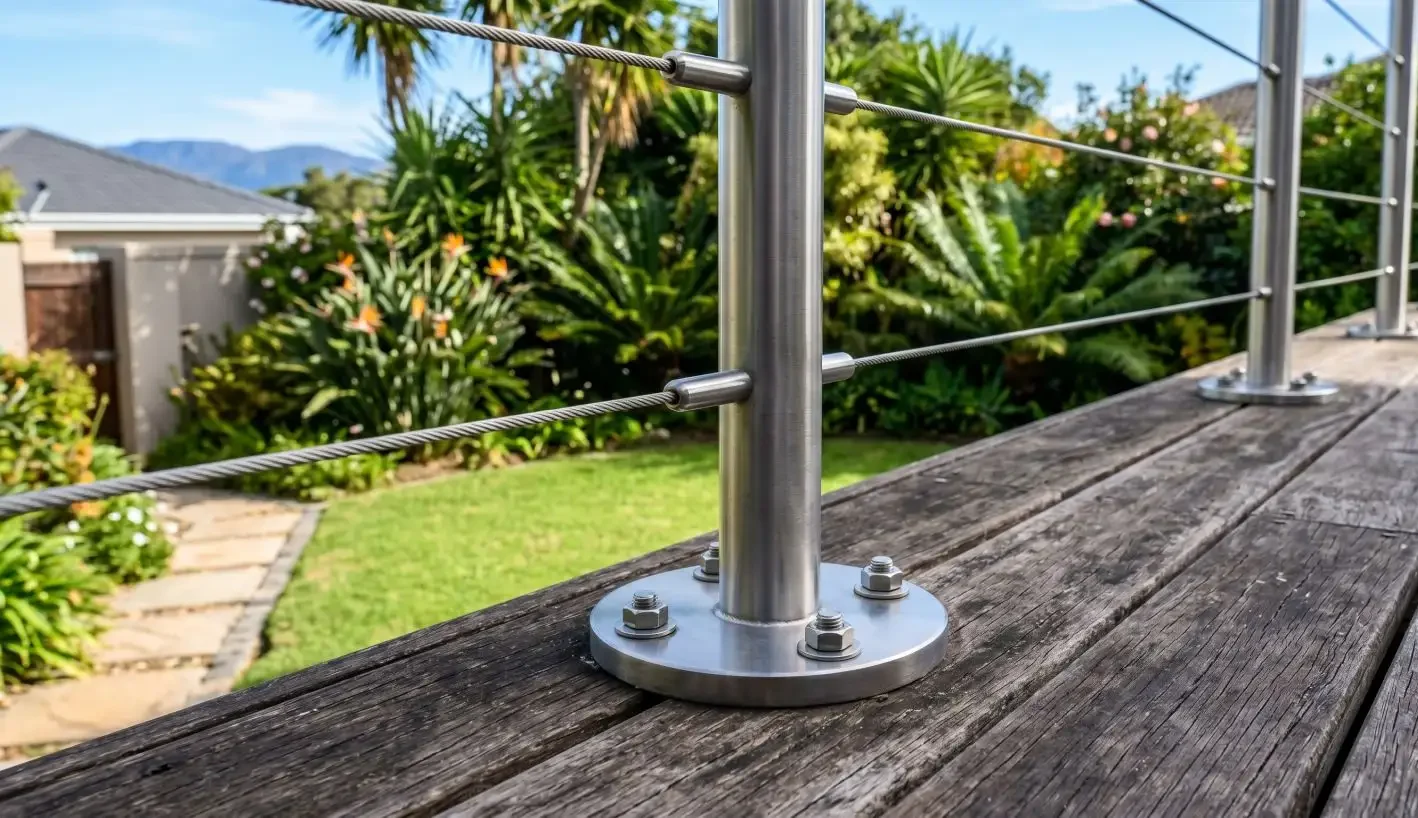
The assumption that installing a stainless steel balustrade requires a welder stops a lot of capable DIY homeowners before they even start researching. It is an understandable assumption — steel and welding feel like they belong together. But for residential balustrade installation, it is simply not true.
Modern bolt-down stanchion systems are designed specifically so that no welding is required at any stage of the installation. The posts arrive pre-drilled, the infill tubes thread through them, and every connection in the system is mechanically fastened with standard spanners and a torque wrench. If you can drill a hole and tighten a bolt, you have the skills this installation requires.
This post explains exactly how a no-weld balustrade system works, what the assembly process involves at each stage, and what the finished installation looks and feels like structurally. It is aimed at homeowners who are at the “is this even possible for me?” stage — not yet planning the installation, but trying to work out whether it is realistic.
The short answer is yes. Here is the longer one.
Where the Welding Assumption Comes From
The welding assumption is not entirely unfounded. Traditional fabricated balustrades — the kind a metalwork contractor or steel fabricator produces — are welded. The stanchions are welded to base plates. The infill rails are welded to the posts. The whole assembly is fabricated off-site as a single rigid unit, delivered, and bolted to the structure as a finished piece.
This approach produces a strong, seamless result, but it requires a fabrication workshop, welding equipment, and the skills to use them. It also means the balustrade is a custom one-off piece — not something a homeowner can assemble themselves from components.
What changed the picture for DIY homeowners is the development of component-based mechanical fitting systems. These systems use pre-drilled posts, mechanical fittings, and threaded fasteners to achieve the same structural result without any welding. The components are manufactured to precise tolerances in a controlled environment; the homeowner assembles them on site with hand tools. The result is indistinguishable from a professionally installed fabricated balustrade — and it is fully compliant with SANS 10400-M when installed correctly.
How a Bolt-Down Stanchion System Works
The core of a no-weld balustrade system is the bolt-down stanchion. Understanding how it works makes the rest of the system immediately logical.
The stanchion
A stanchion is the vertical post that forms the structural backbone of the balustrade. In Balustrader’s system, stanchions are manufactured from stainless steel tube — either 38.1mm or 50.8mm diameter depending on your design — with a base plate welded to the bottom end at the factory. The infill holes are pre-drilled through the stanchion body at the correct positions and diameter for your chosen infill type before the post leaves the factory.
This factory pre-drilling is what makes the no-weld system possible. Because the holes are precision-drilled in a controlled environment, the infill tube fits cleanly and accurately without any on-site modification to the stanchion. You are not drilling or cutting the post — you are assembling it.
Fixing to the substrate
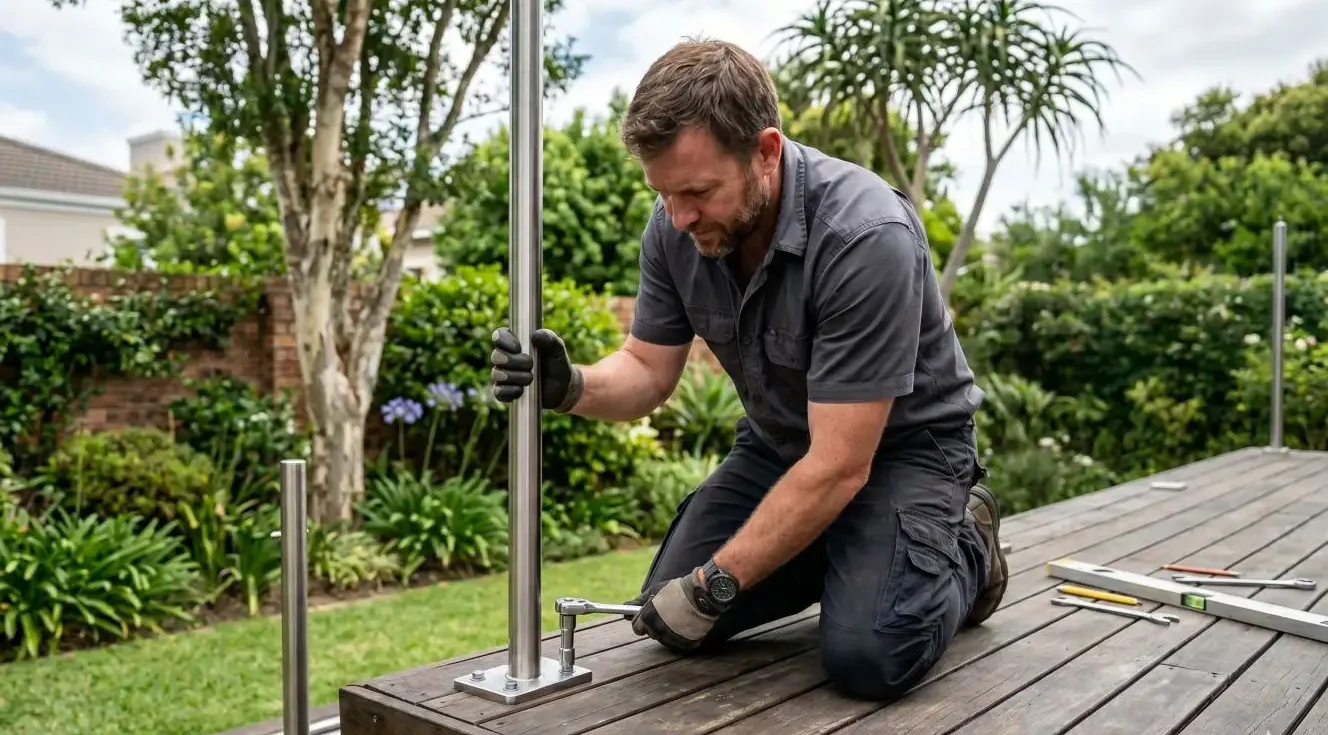
The base plate at the bottom of each stanchion is the fixing point to the substrate — whether that is a concrete slab, a timber deck, a paving surface, or a steel structure. The homeowner drills anchor holes at the marked positions, inserts chemical epoxy anchors or mechanical anchors depending on the substrate, and bolts the base plate down through the anchor points.
This is a standard construction fixing method used across the building industry. It requires a hammer drill, the correct anchor product for the substrate, and a torque wrench to tighten the bolts to specification. No welding, no fabrication, no specialist equipment beyond what a well-equipped DIY homeowner already owns or can hire for the day.
Infill assembly
Once the stanchions are anchored and cured, the infill is assembled. For a round tube system, the infill tubes are cut to length with an angle grinder and threaded horizontally through the pre-drilled holes in each stanchion in turn. The tubes are held in position by the stanchion holes themselves — the fit is snug enough that the tube does not rattle or move laterally once in place.
End caps are fitted to the exposed tube ends. Depending on the fitting type, intermediate fixings may be used to lock the tube position relative to the end stanchions. The top rail is fitted last, either by threading through the stanchion tops or by using saddle-type rail fittings that clamp the rail into position.
For cable infill systems, the wire rope is run through cable fittings on the stanchions and tensioned using mechanical tensioners at the end posts. The only specialist tool this requires is a hydraulic crimper for the swage end fittings — everything else in a cable assembly uses standard spanners.
What the Connections Actually Look Like
One of the concerns homeowners raise about mechanical fitting systems is whether the connections will look obviously DIY — visible bolts, mismatched components, or a finish that gives away the absence of a welder. It is a fair concern and worth addressing directly.
The connections in a properly assembled mechanical balustrade system are designed to be unobtrusive. Base plate bolts sit at the bottom of the stanchion and are typically hidden by the deck surface context or partially recessed. Infill tube ends are capped with press-in or screw-in caps that produce a clean, finished appearance. Rail fittings are machined from solid stainless steel bar stock and have a precision appearance that reads as intentional, not makeshift.
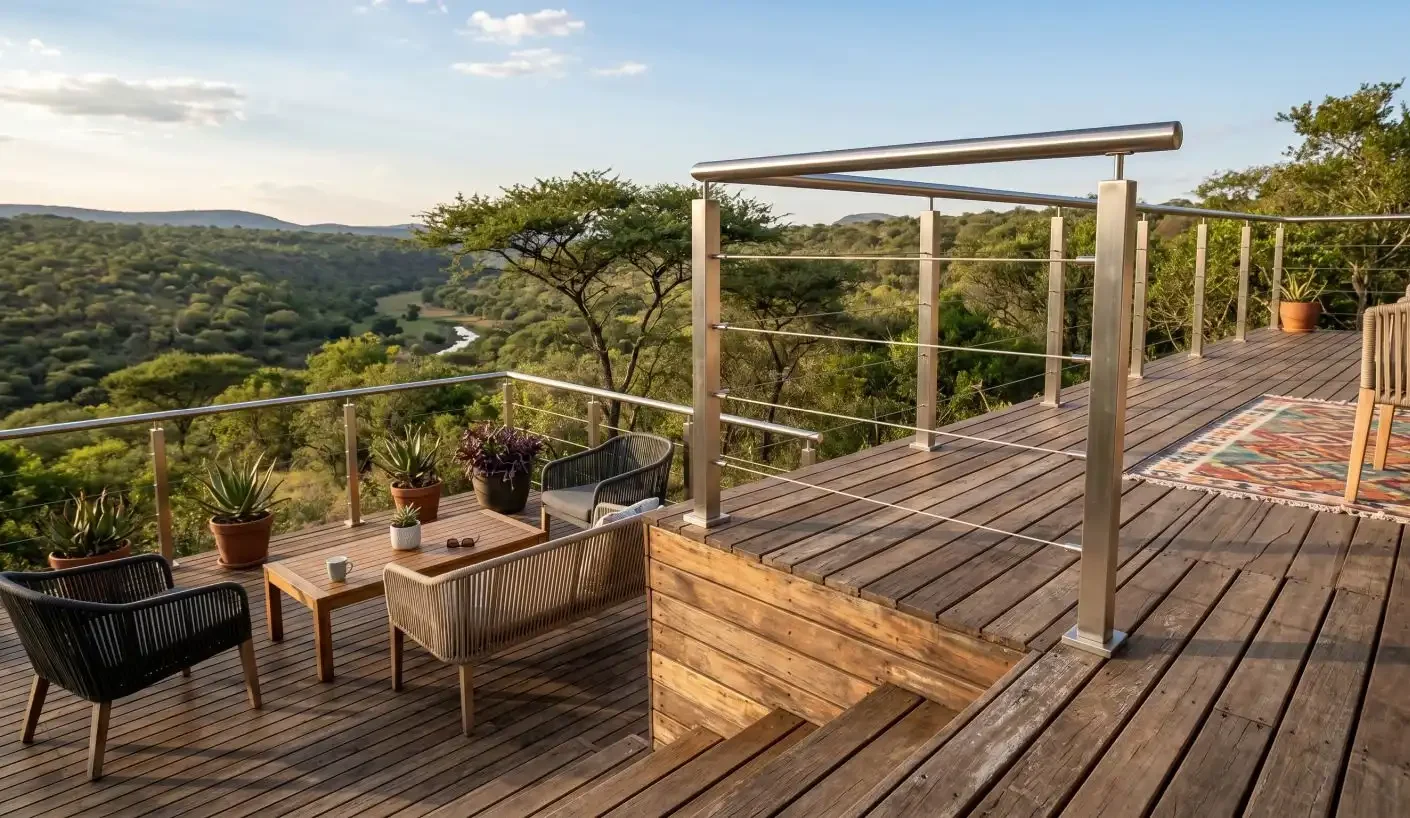
The overall visual impression of a completed bolt-down stanchion installation is clean, modern, and professional. There are no weld beads to grind back, no heat discolouration to polish out, and no filler material at the joints. The brushed satin finish of the stainless steel is consistent across the entire run because nothing on the site has been subjected to heat.
Is It as Strong as a Welded Balustrade?
This is the question that matters most, and the answer deserves a straight response: yes, when installed correctly to specification, a mechanical bolt-down stanchion system meets the same structural load requirements as a welded installation.
SANS 10400-M, the South African standard governing stairways and balustrades, specifies the performance requirements a balustrade must meet — not the method of construction used to achieve them. The relevant load requirement for a domestic residential balustrade is a distributed horizontal load of 0.5 kN per metre applied to the top rail, with a simultaneous point load of 0.5 kN. Both welded and mechanical systems must meet this standard. The mechanical system does so through the combined strength of the anchor fixing, the base plate, the stanchion tube, and the infill assembly — not through welded joints.
The critical variable in a mechanical system’s structural performance is the anchor fixing. A correctly specified and properly installed chemical epoxy anchor in sound concrete will hold the stanchion against the required loads. An incorrectly specified anchor, an oversized drill hole, or an anchor installed before the epoxy has fully cured will not. This is why anchor selection, hole sizing, and cure time matter — they are not administrative details, they are structural ones.
| Welded fabricated system | Mechanical bolt-down system |
| Fabricated in a workshop | Assembled on site from components |
| Requires welding equipment and skills | Requires standard DIY hand tools |
| Heat-affected zones require post-weld finishing | No heat — consistent brushed finish throughout |
| Custom one-off piece | Component-based — parts are replaceable |
| Strength relies on weld quality | Strength relies on anchor specification and installation |
| Installed as a complete unit | Assembled sequentially on site |
| Professional installation required | DIY-achievable with the right preparation |
What a No-Weld Installation Actually Involves, Step by Step
For a homeowner at the research stage, a plain-language summary of the actual installation process is more useful than a detailed technical guide. The detail comes later — this is the overview that answers the question “what would I actually be doing?”
- Measure and plan — Work out your linear metreage, stanchion spacing, and infill configuration. Submit your measurements to Balustrader for a confirmed component list.
- Order components — Pre-drilled stanchions, infill tube or cable, fittings, hardware, and consumables are ordered as a package. Components arrive ready for assembly — no machining or modification required on site.
- Mark positions — Using a chalk line and tape measure, mark each stanchion centre position on the substrate. Check alignment before drilling anything.
- Drill anchor holes — Using a hammer drill and the correct masonry bit, drill to the anchor manufacturer’s specified depth. Clean the hole before inserting the anchor.
- Set anchors and fix stanchions — Insert chemical anchors and allow to cure fully before loading. Once cured, position the stanchion base plate, check plumb on both axes, and tighten to the specified torque.
- Thread infill — Cut infill tubes to length with an angle grinder. Thread them horizontally through the pre-drilled stanchion holes from one end of the run. Fit end caps.
- Fit the top rail and finish hardware — Thread or clamp the top rail into position. Fit all remaining hardware. Run a torque check on all fixings.
- Final inspection — Check infill gaps, confirm plumb and level, wipe down all surfaces. The installation is complete.
The tools involved across that entire process are a hammer drill, an angle grinder, a spirit level, a tape measure, a torque wrench, and a set of spanners. A welder appears nowhere on the list.
What You Cannot Do Without Welding
Honesty matters here. There are elements of balustrade work where welding remains the appropriate method, and a no-weld system is not a universal substitute for all situations.
Completely custom architectural designs — curved rails, bespoke geometric infill patterns, or non-standard post profiles — are typically fabricated by a metalwork specialist and may involve welding. If your project is a standard residential balustrade on a deck, balcony, pool surround, or staircase, a mechanical system covers everything you need. If your project is an architectural statement piece with custom geometry, fabricated welded components may be part of the answer.
Similarly, repairs to existing welded balustrades may require welding if the structural element that needs repair is a welded joint. Mechanical systems are a construction method, not a repair method for welded installations.
For the vast majority of residential DIY balustrade projects in South Africa — and this is the application these systems are designed for — no welding is required at any point.
Ready to Find Out if Your Project Qualifies?
If your project is a standard residential deck, balcony, pool surround, or staircase balustrade — straight runs, standard height, conventional substrate — a no-weld bolt-down stanchion system is almost certainly suitable. The question is not whether the system can do it; it is which components you need and in what quantities.
Balustrader’s free DIY Estimate service is the practical next step. Send through your measurements and project details — linear metreage, substrate type, infill preference, and whether your property is coastal — and the team will confirm a component list with pricing. There is no commitment required to request an estimate, and it gives you the concrete information you need to make a decision.
You can reach the team at sales@balustrader.co.za or +27 64 044 1440, Monday to Friday, 08:00 to 17:00. The Brackenfell showroom is open for those who want to see the components in person before ordering.
| What you need to install a no-weld balustrade ✓ A hammer drill — for anchor holes in concrete or masonry ✓ An angle grinder — for cutting infill tube to length ✓ A spirit level — for setting stanchions plumb ✓ A torque wrench — for tightening anchors and fixings to specification ✓ A tape measure and chalk line — for accurate layout ✓ Standard spanners — for assembly hardware What you do not need: a welder, a fabrication workshop, or metalworking experience of any kind. |


